How to Watch IPTV on Amazon Firestick: The Complete Sideloading, Player Setup & Performance Tuning Masterclass (2026)
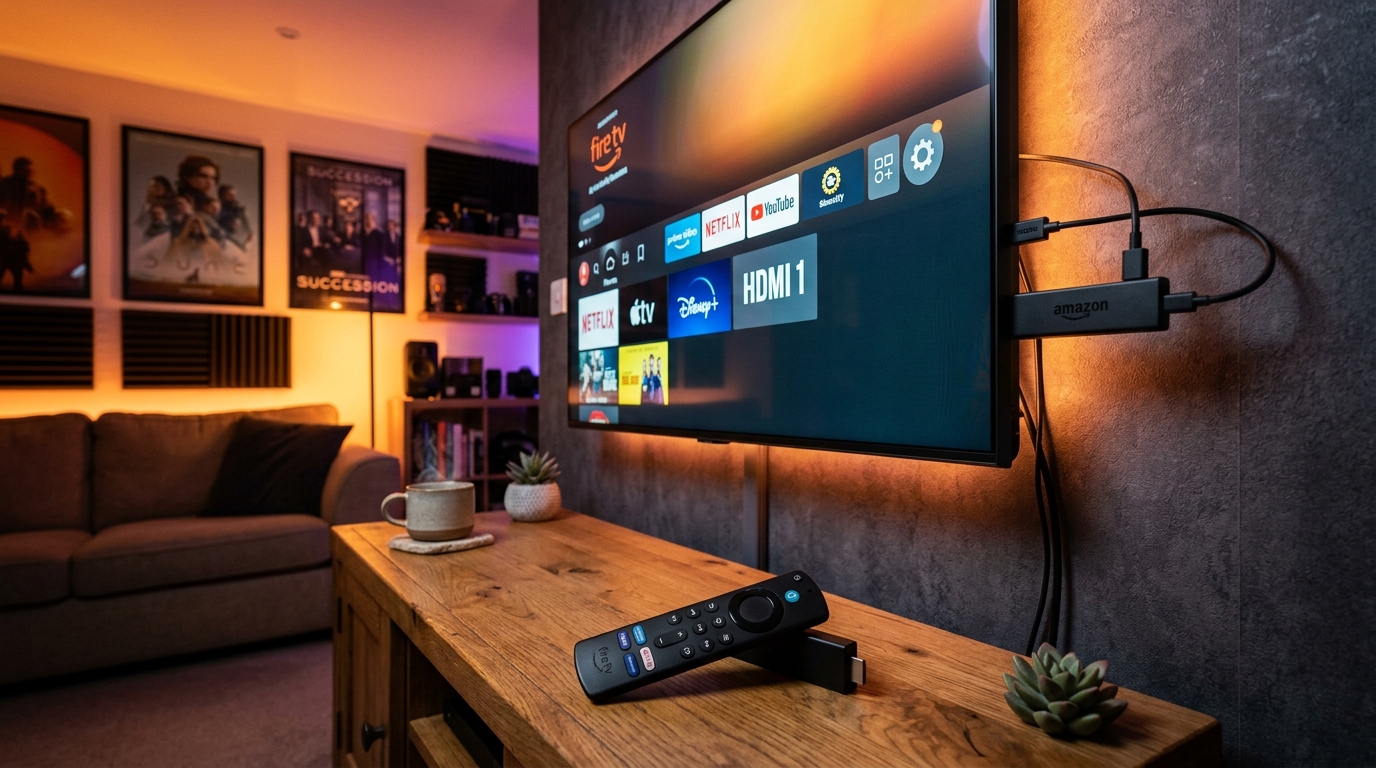
The Amazon Fire TV Stick (encompassing the Fire TV Stick Lite, Firestick 4K, Fire TV Stick 4K Max, and Fire TV Cube) is undisputed as the most widely deployed streaming terminal in the global cord-cutting movement. Combining pocket-sized portability, an intuitive physical voice remote, robust hardware video decoders, and an accessible price point, Amazon's streaming hardware provides an exceptional platform for experiencing live television over internet protocol networks.
However, because the Amazon Appstore does not natively host independent IPTV player applications due to corporate ecosystem policies, getting started with IPTV on a Firestick requires a brief, one-time configuration process known as sideloading. Sideloading is simply the process of transferring and installing an Android application package (APK) directly onto the device using official developer permission settings built into Fire OS.
When configured properly, an Amazon Firestick delivers fluid 60 FPS live sports, responsive Electronic Program Guides (EPG), and instantaneous 4K video playback. When configured poorly—cluttered with unmanaged background processes, bloated cache files, and unoptimized decoder settings—the device can experience interface stutter, overheating, and stream buffering.
This comprehensive technical guide provides an end-to-end masterclass on setting up, optimizing, and maintaining IPTV on Amazon Fire TV devices. From unlocking hidden developer menus and utilizing the Downloader utility to calibrating Fire OS display settings and eliminating memory bloat, this tutorial ensures your Firestick delivers broadcast-grade entertainment directly to your living room.
1. Comparing Fire TV Hardware: Choosing the Right Stick for IPTV
Before beginning installation, it is crucial to understand the silicon capabilities of your specific Fire TV model. Amazon has released multiple generations of Firestick hardware, each with distinct processor architectures and memory bandwidth limits:
+--------------------------------------------------------------------------+
| Amazon Fire TV Model Hierarchy & IPTV Suitability                        |
|                                                                          |
| 1. Fire TV Cube (3rd Gen)    : Octa-Core 2.2GHz │ 2GB RAM │ Wi-Fi 6E │ S |
| 2. Fire TV Stick 4K Max (2nd): Quad-Core 2.0GHz │ 2GB RAM │ Wi-Fi 6E │ A+|
| 3. Fire TV Stick 4K (Standard): Quad-Core 1.7GHz │ 1.5GB   │ Wi-Fi 6  │ B+|
| 4. Fire TV Stick (3rd Gen HD) : Quad-Core 1.7GHz │ 1GB RAM │ Wi-Fi 5  │ B |
| 5. Fire TV Stick Lite        : Quad-Core 1.7GHz │ 1GB RAM │ Wi-Fi 5  │ C |
+--------------------------------------------------------------------------+
Why Hardware Tiers Matter for Live IPTV
- Memory (RAM) Constraints: Budget models (such as the Firestick Lite or standard HD Stick) feature only 1 GB of RAM. In modern IPTV, loading extensive channel playlists containing over 20,000 entries can consume 600 MB or more of memory, leaving the operating system starved for RAM.
- Hardware Codec Support: The Fire TV Stick 4K Max and Fire TV Cube feature dedicated hardware decoding blocks for AV1, HEVC (H.265), and VP9, enabling them to decode 4K 60 FPS sports streams with zero dropped frames and negligible thermal buildup.
- Wi-Fi 6E and Storage: Newer 4K Max models support Wi-Fi 6E (accessing the pristine 6 GHz wireless band) and feature 16 GB of internal flash storage, providing ample room for channel databases and Electronic Program Guide caches.
2. Unlocking Developer Options and Preparing Fire OS
Because IPTV players like TiviMate or IPTV Smarters Pro are distributed as independent APKs, you must enable Fire OS to install applications from trusted external sources.
In recent updates to Fire OS 7 and Fire OS 8, Amazon concealed the Developer Options menu by default. Follow this exact sequence to reveal it:
[Settings Icon (Gear)] ──► [My Fire TV] ──► [About]
                                                 │
                                                 ▼
             [Click Fire TV Model Name 7 Times Rapidly!]
                                                 │
                                                 ▼
          [Notification: "No need, you are already a developer."]
                                                 │
                                                 ▼
             [Developer Options Menu Revealed in My Fire TV!]
Step-by-Step Instructions:
- Turn on your Amazon Firestick and navigate to the Settings Gear Icon on the far right of the home screen navigation bar.
- Scroll down and select My Fire TV (or Device & Software on older models).
- Click on About.
- Highlight the first item, which displays your exact Fire TV device name (e.g., Fire TV Stick 4K Max).
- Press the Select button (center circle) on your remote 7 times rapidly.
- A toast notification will appear at the bottom of the screen stating: "No need, you are already a developer."
- Press the Back button once. You will now see a new menu item labeled Developer Options directly beneath About.
- Click on Developer Options.
- Turn ADB Debugging to ON.
- Click on Install Unknown Apps (or Apps from Unknown Sources). Keep this menu in mind, as we will authorize our installation utility in the next step.
3. Installing and Authorizing the Downloader Utility
The premier tool for transferring external applications onto Fire OS is Downloader by AFTVnews. This application is an official utility available directly from the Amazon Appstore.
[Amazon Appstore Search: "Downloader"] ──► [Install Orange Downloader Icon]
                                                     │
                                                     ▼
[Settings -> My Fire TV -> Developer Options] ──► [Install Unknown Apps]
                                                     │
                                                     ▼
                  [Toggle Downloader Permission to "ON"]
Step-by-Step Installation:
- Return to the Firestick home screen and click the Find (Magnifying Glass) icon.
- Select Search and type
Downloader. - Locate the official Downloader application featuring the prominent orange icon created by AFTVnews.com.
- Click Download or Get to install the application.
- Once installed, do not launch the app immediately. First, grant it installation permissions:
- Go to Settings -> My Fire TV -> Developer Options -> Install Unknown Apps.
- Find Downloader in the list.
- Click the Select button to toggle permission to ON.
- Launch Downloader from your Apps & Channels row.
- Click Allow when prompted to permit Downloader to access photos, media, and files on your device.
4. Sideloading the Top IPTV Player Applications
With Downloader authorized, you can install the premier IPTV player applications directly onto your Firestick:
Method 1: Sideloading TiviMate IPTV Player (Recommended)
TiviMate is the gold standard application for Firestick devices, providing an interface that replicates high-end satellite and cable boxes:
- Open Downloader.
- In the URL/Search bar, enter the official direct numeric quick-code for TiviMate:
- Enter Code:
278077(ortivimate.com).
- Enter Code:
- Click Go. Downloader will connect to the official server and begin downloading the latest TiviMate APK package (approximately 15 MB).
- When the download completes, a system prompt will appear. Click Install.
- Once installation finishes, click Delete on the Downloader prompt to remove the installer APK file and conserve device flash storage.
Method 2: Sideloading IPTV Smarters Pro
IPTV Smarters Pro is the most popular cross-platform media player:
- In the Downloader URL bar, enter the direct quick-code for IPTV Smarters Pro:
- Enter Code:
80911(or direct URLfiresticktricks.com/smarters).
- Enter Code:
- Click Go to initiate the download.
- Click Install when prompted.
- After installation, click Delete to purge the temporary APK installer.
Method 3: Sideloading XCIPTV Player
For users who prefer a modern dashboard with built-in media engine toggles:
- In Downloader, enter the direct code:
41643. - Click Go, download the APK, and select Install.
5. Connecting Your VIPSATV Subscription via Xtream Codes API
Once your chosen player is installed, connecting your active VIPSATV subscription plan takes less than 60 seconds using the high-performance Xtream Codes API protocol:
[Launch TiviMate or Smarters] ──► [Select "Add Playlist" -> "Xtream Codes API"]
                                                │
                                                ▼
              [Server URL: http://line.vipsatv.pro:8080]
              [Username  : your_assigned_username      ]
              [Password  : your_assigned_password      ]
                                                │
                                                ▼
         [Click "Next" / "Login" ──► Channels & EPG Ingest Instantly!]
Step-by-Step Account Configuration:
- Launch TiviMate or IPTV Smarters Pro from your Firestick app library.
- Click Add Playlist and select Xtream Codes API.
- Input your credentials exactly as provided in your activation confirmation:
- Server URL: Enter
http://line.vipsatv.pro:8080(make sure to include the port number). - Username: Your unique subscription username.
- Password: Your secure subscription password.
- Server URL: Enter
- Ensure the checkbox for Include VOD and Download EPG is checked.
- Click Next or Login.
- The player will establish an encrypted handshake with the VIPSATV Anycast server cluster, categorize thousands of live channels, download high-definition movie posters, and synchronize seven days of TV guide schedules.
6. Fire OS Performance Tuning: Disabling Amazon Background Bloatware
By default, Amazon Fire OS runs dozens of background telemetry processes, auto-playing video trailers, and advertising tracking algorithms that consume system RAM and compete for processor cycles. Disabling these unnecessary services frees up substantial hardware performance for video decoding:
+--------------------------------------------------------------------------+
| Fire OS Optimization Checklist                                           |
|                                                                          |
| [Settings -> Preferences -> Privacy Settings]    ──► Turn ALL OFF        |
| [Settings -> Preferences -> Data Usage Monitoring]──► Turn OFF           |
| [Settings -> Preferences -> Featured Content]    ──► Turn Audio/Video OFF|
| [Settings -> Applications -> Appstore]           ──► Turn Auto-Updates ON|
+--------------------------------------------------------------------------+
1. Disable Privacy Telemetry and Tracking
- Open Firestick Settings -> Preferences -> Privacy Settings.
- Turn Device Usage Data to OFF.
- Turn Collect App Usage Data to OFF.
- Open Interest-Based Ads and toggle it to OFF.
2. Disable Auto-Playing Video and Audio Previews
- Navigate to Settings -> Preferences -> Featured Content.
- Turn Allow Video Autoplay to OFF.
- Turn Allow Audio Autoplay to OFF. This stops Amazon from loading heavy advertising trailers in the background while you navigate menus, freeing up over 150 MB of system RAM.
3. Disable Data Usage Monitoring
- Go to Settings -> Preferences -> Data Usage Monitoring.
- Toggle it to OFF. This terminates background packet logging daemons that consume CPU cycles.
7. Storage and RAM Management: How to Clear Cache and Prevent Freezes
Standard Firestick models possess only 8 GB of internal flash memory, of which nearly 4 GB is consumed by Fire OS itself. Over months of use, streaming apps accumulate cached channel logos, thumbnail images, and EPG data that can exhaust available storage, causing sudden app crashes:
[Settings] ──► [Applications] ──► [Manage Installed Applications]
                                         │
                                         ▼
[Select TiviMate / Smarters] ──► [Click "Clear Cache" (DO NOT click Clear Data!)]
The Difference Between "Clear Cache" and "Clear Data"
- Clear Cache (SAFE): Purges temporary thumbnail image files and expired guide fragments. It frees up storage without deleting your login credentials or channel favorites.
- Clear Data (WARNING): Completely resets the application back to its factory default state. This will erase your account logins, requiring you to re-enter your credentials.
Routine Maintenance Schedule
Once every 30 days:
- Open Settings -> Applications -> Manage Installed Applications.
- Scroll through your installed apps and select Clear Cache on apps with large caches (like Downloader, Prime Video, and your IPTV player).
- Restart your Firestick by holding down the Select (center) and Play/Pause buttons on your remote for 5 seconds until the device reboots.
8. Hardwiring Your Firestick: The OTG Ethernet Masterclass
While Wi-Fi is convenient, live 60 FPS sports streaming demands uninterrupted, deterministic throughput that wireless connections struggle to provide:
+--------------------------------------------------------------------------+
| Firestick OTG Ethernet Wiring Diagram                                    |
|                                                                          |
| [Wall Power Outlet]                                                      |
|         │                                                                |
|         ▼                                                                |
| [USB Power Cable] ──► [Micro-USB OTG Y-Splitter Adapter]                 |
|                                     │                                    |
|         ┌───────────────────────────┴───────────────────────────┐        |
|         ▼                                                       ▼        |
| [USB-to-Gigabit Ethernet Jack] ◄── [Cat6 Cable]       [Male Micro-USB Plug]
|                                                                 │        |
|                                                                 ▼        |
|                                                    [Amazon Firestick HDMI|
+--------------------------------------------------------------------------+
Components Required for Hardwiring
- Micro-USB Host OTG "Y" Cable: Available for under $6 on Amazon. Splits the single power port into an external USB input.
- USB 3.0 to Gigabit Ethernet Adapter: Connects to the female USB port on the OTG cable.
- Cat6 Ethernet Cable: Run directly from your home broadband router or mesh satellite node.
Once plugged in, Fire OS automatically detects the wired interface and routes all IPTV video packets across Ethernet with 0ms jitter and zero radio interference.
9. Player Playback Settings: Enabling MediaCodec Hardware Acceleration
Inside TiviMate, IPTV Smarters Pro, or XCIPTV, configuring the proper video decoding engine is essential for silky 60 FPS playback:
+--------------------------------------------------------------------------+
| TiviMate Video Decoder Selection                                         |
|                                                                          |
| Hardware (MediaCodec) : Direct to GPU │ 60 FPS Fluid │ 0% CPU Heat │ YES |
| Software (CPU Thread) : Rendered by CPU│ Dropped Frames│ Overheating │ NO  |
+--------------------------------------------------------------------------+
Step-by-Step Decoder Configuration:
- In TiviMate, open Settings -> Playback.
- Select Video Decoder and confirm it is set to Hardware.
- Select Audio Decoder and verify it is set to Hardware.
- Set Auto Frame Rate (AFR) to ON. This allows the Firestick to automatically match your TV's refresh rate to incoming broadcast streams (e.g., 50 Hz for European soccer or 60 Hz for NFL/NBA).
- Set Buffer Size to Small (or Medium if connected over Wi-Fi).
10. Eliminating HDMI CEC and Sleep Timeout Glitches
Many Firestick users report that their television unexpectedly turns off or switches inputs while streaming a live broadcast. This is caused by Fire OS power management policies:
1. Adjust HDMI CEC Settings
- Go to Settings -> Display & Sounds -> HDMI CEC Device Control.
- If your Firestick turns off your TV when going idle, toggle HDMI CEC to OFF (or customize device power controls under Settings -> Equipment Control).
2. Prevent Display Dimming During Long Broadcasts
Fire OS dims the display if it detects no remote control input for 20 minutes. Modern players like TiviMate and Smarters prevent this automatically by holding an active "WakeLock" during video playback. Ensure Keep Screen On is checked within your player's playback settings.
11. Comprehensive Firestick Troubleshooting Guide
1. "Parse Error: There was a problem parsing the package"
- Root Cause: The downloaded APK file is incomplete due to a dropped internet connection, or the application requires a newer version of Fire OS than your hardware supports.
- Fix: In Downloader, delete the corrupted APK file, clear Downloader's cache in Firestick settings, and re-download the package using the direct numeric code.
2. Firestick Overheating and Throttling
- Root Cause: Streaming dongles plugged directly into the back of an OLED or LED television absorb radiant heat from the panel. When internal temperatures exceed 75°C, the processor throttles performance, causing video stuttering.
- Fix: Use the flexible HDMI Extender Dongle included in your Firestick box. This positions the streaming stick several inches away from the television chassis, improving airflow and lowering operating temperatures by up to 15°C.
3. TiviMate Closes Suddenly Back to Home Screen
- Root Cause: Low available RAM caused by background applications.
- Fix: Download the free Background Apps & Process List app from the Amazon Appstore. Use it to force close lingering background applications like YouTube or Netflix, freeing up system memory.
12. External USB Storage Expansion: Storing PVR Recordings on Firestick
Because standard Firestick devices contain minimal free internal storage, connecting external USB storage allows you to record live sporting events and store extensive Electronic Program Guide databases without risking device memory crashes:
[Firestick Micro-USB Port] ──► [OTG "Y" Cable] ──► [USB 3.0 Flash Drive / SSD (FAT32)]
                                                       │
                                                       ▼
                                     [TiviMate PVR Recording Destination: 128 GB!]
Step-by-Step USB Storage Configuration
- Format USB Flash Drive as FAT32: On a Windows PC or Mac, format a reliable USB 3.0 flash drive (32 GB, 64 GB, or 128 GB) using the FAT32 filesystem. Fire OS cannot natively read NTFS or exFAT drives.
- Connect via OTG Cable: Plug your USB drive into the female USB-A port on your Micro-USB OTG "Y" cable, and connect the male end to your Firestick.
- Verify Storage Detection: On your Firestick, navigate to Settings -> My Fire TV -> About -> Storage. Confirm that your external USB drive is listed with its available capacity.
- Set TiviMate Recording Folder: In TiviMate settings, open Other -> Recording -> Recordings Folder. Select Select Folder, browse to your external USB drive, and create a directory named
VIPSATV_Recordings. You can now schedule multi-hour high-definition sports recordings with zero storage warnings!
13. Advanced ADB Shell Optimization Masterclass
For technical cord-cutters, running lightweight Android Debug Bridge (ADB) commands unlocks performance optimizations that Amazon's standard settings menus conceal:
How to Connect via Remote ADB Shell
- Ensure ADB Debugging is set to ON under Settings -> My Fire TV -> Developer Options.
- Note your Firestick's local IP address under Settings -> My Fire TV -> About -> Network (e.g.,
192.168.1.115). - Download the free Remote ADB Shell app on an Android phone or launch an ADB terminal on your PC.
- Connect to your Firestick IP address on port
5555.
Recommended ADB Optimization Commands
- Disable Amazon Over-The-Air Update Background Polling:
Prevents unexpected system updates from rebooting your device mid-broadcast.pm disable-user --user 0 com.amazon.device.software.ota - Increase Animation Speed for a Snappier UI:
Cuts interface animation times in half, making remote navigation feel instantaneous.settings put global window_animation_scale 0.5 settings put global transition_animation_scale 0.5 settings put global animator_duration_scale 0.5
14. Custom Remote Button Remapping: Instant Access to Live Television
Standard Amazon Fire TV remotes feature dedicated sponsored shortcut buttons for services you may not subscribe to (such as Netflix, Prime Video, Disney+, or Hulu). You can remap these physical buttons to launch your preferred IPTV player with a single press:
[Unused Remote Button: e.g. "Prime Video"] ──► [Button Mapper Intercept] ──► [Launches TiviMate Instantly!]
How to Remap Remote Buttons
- In Downloader, search for and install Button Mapper by flar2.
- Open Firestick Settings -> Accessibility and enable the Button Mapper Accessibility Service.
- Launch Button Mapper.
- Select Add Buttons and press the dedicated sponsored button on your remote you wish to repurpose.
- Set the Single Tap action to Applications -> TiviMate (or IPTV Smarters Pro).
- Now, clicking that button instantly boots your Firestick straight into your live television guide from any screen!
15. Surround Sound & Audio Passthrough on Fire TV
To experience the full thunder of stadium crowds and commentary in your living room:
- Fire OS Audio Output Calibration: Go to Settings -> Display & Sounds -> Audio -> Surround Sound.
- Select Best Available or Dolby Digital Plus (eARC). If your television is connected to an older optical soundbar that only supports legacy AC-3, select Dolby Digital.
- Player Passthrough Configuration: Open TiviMate Settings -> Playback -> Audio and toggle Audio Passthrough to ON. This allows raw Dolby audio frames to travel directly to your sound system without software re-encoding.
16. Multi-Device Household Management: Deploying TiviMate Configurations
If you own multiple Firestick devices across bedrooms, living rooms, and guest rooms, manually typing server URLs and reordering channel categories on every television is tedious:
[Living Room Firestick: Customizes Channels & Favorites] ──► [Export Backup to Cloud / USB]
                                                                          │
                                                                          ▼
[Bedroom Firestick: "Restore Data"] ◄── [Import Backup in 5 Seconds!]
How to Backup and Clone Your IPTV Setup
- On your primary Firestick, open TiviMate Settings -> General -> Backup Data.
- Save the backup file to your local storage or external USB drive.
- Transfer the
.tmbbackup file to your secondary Firesticks via USB or local network sharing (SMB). - On the secondary device, open TiviMate Settings -> General -> Restore Data.
- Select the backup file. In less than five seconds, all your playlists, Xtream Codes credentials, custom favorite groups, hidden categories, and keybindings will be identical across every television in your home!
17. Fire TV Wi-Fi Optimization: Disabling Wi-Fi Power Savings
If hardwiring your Firestick via Ethernet is not an option in your room layout, adjusting internal Fire OS wireless settings prevents micro-disconnects during live broadcasts:
1. Separate 2.4 GHz and 5 GHz Network Names (SSIDs)
Many mesh routers use "Band Steering," combining both 2.4 GHz and 5 GHz bands under a single Wi-Fi name.
- During video streaming, Fire OS may decide to switch to the 2.4 GHz band because of a stronger signal, causing video to stutter due to radio interference.
- Log into your router and create a dedicated SSID for the 5 GHz band (e.g.,
Home_5G). Connect your Firestick exclusively to this network.
2. Disable Wi-Fi Sleep Optimization via Developer Options
Fire OS attempts to enter aggressive low-power states when it perceives network traffic as steady:
- In Developer Options, locate Wi-Fi Power Save Mode and toggle it to OFF.
- This keeps the wireless radio chip operating at full power, eliminating micro-sleep latency spikes during 60 FPS live sports feeds.
18. Installing a Custom Clean Launcher (Projectivy Launcher)
Amazon's standard Fire TV home screen is heavily saturated with full-screen banner advertisements, sponsored movie recommendations, and auto-playing video trailers that consume over 300 MB of system RAM. Power users replace this cluttered interface with Projectivy Launcher:
DEFAULT AMAZON HOME SCREEN (BLOATED):
[Sponsored Ads] ──► [Auto-Playing Prime Video Trailers] ──► [Slow Navigation & 100MB Free RAM]

PROJECTIVY CUSTOM LAUNCHER (CLEAN & FAST):
[TiviMate IPTV]  [IPTV Smarters]  [YouTube]  [Settings] ──► [Lightning Fast & 800MB Free RAM!]
How to Install and Set Up Projectivy Launcher:
- Open Downloader and enter direct numeric code
498526(or search for Projectivy Launcher APK). - Install the application.
- Open Projectivy settings and enable Override Current Launcher.
- Customize your home screen with a clean dark wallpaper, prominent VIPSATV channel shortcuts, and zero advertisements.
- Your Firestick will now boot directly into a clean, lightning-fast dashboard that dedicates 100% of its silicon power to video decoding.
Experience VIPSATV
Upgrade your entertainment with ultra-stable, anti-freeze streaming. Access premium live channels, global sports, and curated VOD across all your supported devices.
Frequently Asked Questions
Conclusion and Setup Summary
The Amazon Fire TV Stick is an extraordinary streaming platform that, when configured with professional tools like TiviMate and optimized for hardware decoding, punches far above its weight class.
By unlocking Developer Options, sideloading top-tier players, connecting via hardwired Ethernet, and eliminating Amazon's background bloatware, you can transform a modest $40 streaming stick into a broadcast powerhouse.
Pair your optimized Firestick with an enterprise, anti-freeze provider engineered for peak performance. Explore our complete lineup of VIPSATV subscription plans, check our comprehensive device setup tutorials, or contact our Fire TV support specialists through our support center.